Folders |
Throwing Between the Lines: The Power Throw - April 16, 2013
Published by
By Ben Bishop
In this post we will begin to establish the progressions to a completing a full throw. In the same way that you would begin a new thrower, a new throwing session, or a new meet, we will start with discussing the power throw. The thrower must become proficient at these before being able to deliver any other progressions successfully.
In both the shot put and the discus: The idea behind a successful power throw is that we can apply force to the implement for as long as possible. This is where throwers with long levers have an advantage over shorter throwers: they are able to push/pull the implement through a longer acceleration path. This is also why it is essential for shorter throwers to be able to use correct technique to ensure that they are maximizing the distance of this acceleration path because they are already lacking in the levers department.
The wind of the implement is done in hopes that we can begin to accelerate it from a point further from the release point, not to generate momentum or a stretch-reflex. The rhythm of the delivery should not be influenced by the wind, it is merely seeking to set the implement back in an optimal position and then “start from zero” (referring to the acceleration of the implement).
The action of the throw “starting from zero” begins from the ground, upwards. Emphasize this in the development of the power thrower and start by drilling it slowly. Working the right toe, then knee, then hip, then shoulder and implement into the throw in that order. Cues:
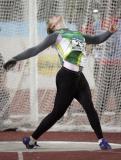
Discus: When winding the discus, wind it in a way that uses the hips to set the arm back. The hips initiate every phase of the throw. The most commonly heard word at our practice? Hip(s).
The discus has a much more rotational delivery than the shot put does. The left leg/left side of our body acts as a post (which creates the “block”) that our right side is throwing around. The mechanics of the discus power throw are illustrated here. To establish and reinforce the proper mechanics, a full progression of med ball drills is shown here. (Videos I created for the 2012 ITCCCA clinic, featuring my brother, Brian.)
Points of interest:
Shot Put: Although Brian and I have yet to make any captioned shot put videos, let’s discuss the big picture here. The acceleration of the shot put power throw is done in a linear fashion. There isn’t necessarily a “winding” action going on here as compared to the discus. We seek to set the shot put back over the right toe (which should be pointing out the back of the ring). From there, in a similar heel-toe relationship from the discus, we push the knee/hip “out from under” us. In this action, the left heel sets and we begin to post up and throw up and over the left leg (as opposed to rotationally around the left side in the discus). The hip action is “up and into” the ball, with the upper body/arm used as a secondary push.
Cues:
|


